We were planning to change our current workflow to split ducts and pipes in order to include more features into the process. At the moment the suite of add-ins we use don’t suit our needs 100% and we have to go through many steps to get to the final product.
This is the reason we started building our own add-in including all our production requirements.
As part of a scope discovery process, we mocked up the different parts of the final solution using Dynamo as a sandbox to later be included into a single Revit add-in.
We would like share with you the user requirements of the pipe/duct splitting process and how we solve it using Dynamo.


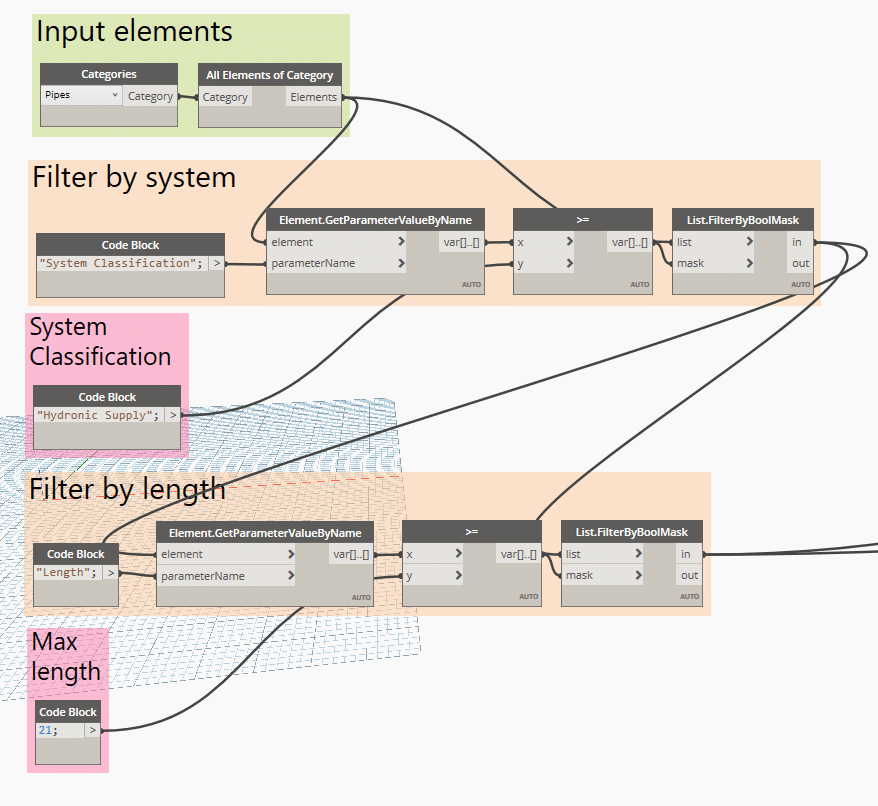
Select pipes and filter by length
The first step is to collect all pipes in the model and filter them by system and the by max length. Later in the process the system selection will be done by a GUI drop down. User must be allowed to select directly from Revit’s UI.
We need to add the length of the coupling to the total calculation. This parameter depends on the diameter of the pipe and works related to the fitting Lookup tables. We use a hard coded dictionary where the key is the diameter of the pipe (in inches) and a value with the fitting length (in feet). Diameters are doubles and need to be formatted to be used as keys. We use a small python script to do this "OUT = ['{:.2f}'.format(x) for x in IN[0]]"; where we format the length to 2 decimals.

Place a point at segment end
We create a point at the pipes curves using the segment lengths plus the couplings. Remember we need to include the coupling into the calculation because it will “steal” part of the pipe length when it’s placed later in the process.

Split pipes
Since the Revit 2017 API we can use a method called BreakCurve which splits a MEPCurve (Duct, Pipe) into segments by a point. Note we are using PlumbingUtils.BreakCurve to split the pipes but it’s the same procedure for MechanicalUtils.BreakCurve which will split ducts.
To apply it on our workflow we call it like this:
newPipeId = BreakCurve(doc, pipe.Id, point)
newPipe = doc.GetElement(newPipeId)
This will result on a ElementId from the new pipe created.
Join pipes with fitting
Now we have two pipes and we need to get the connector we will join. We iterate over the connectors and only use the ones with coincident coordinates.
#Get the pipe connectors
newPipeConnectors = newPipe.ConnectorManager.Connectors

#Create connection variables
connA, connB = None, None

for c in pipe.ConnectorManager.Connectors:
    pc = c.Origin
    #get connectorB near to connectorA
    nearest = [x for x in newPipeConnectors if pc.DistanceTo(x.Origin) < 0.01]
    #If exists asign to variables
    if nearest:
        connA = c
        connB = nearest[0]
#doc Create fitting
takeoff = doc.Create.NewUnionFitting(connA, connB)
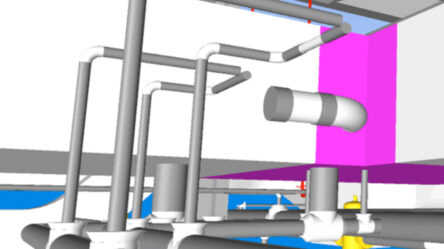
The results
Finally, we now got all the pipes in the model – with a length > than the max segment and with a specific System Classification – split by the segment length.

Now we can plug in the next step in our new process.
Complete python script
Here is a complete python script that splits and joins the pipes. As you can see, the code it’s quite straight forward due to the API methods exposed by Revit.
# Enable Python support and load DesignScript libraryimport clr
clr.AddReference('ProtoGeometry')
from Autodesk.DesignScript.Geometry import *

clr.AddReference("RevitAPI")clr.AddReference("RevitServices")
# import document manager
from RevitServices.Persistence import DocumentManager
# import transaction manager
from RevitServices.Transactions import TransactionManager
# instantiate current document
doc = DocumentManager.Instance.CurrentDBDocument
from Autodesk.Revit.DB.Plumbing.PlumbingUtils
import BreakCurvefrom Autodesk.Revit.DB import XYZ

# The inputs to this node will be stored as a list in the IN variables.
dataEnteringNode = IN

#Get pipes and unwrap
pipes = UnwrapElement(IN[0])
points = IN[1]

# start transaction
TransactionManager.Instance.EnsureInTransaction(doc)
for i, pipe in enumerate(pipes):
    for p in points[i]:
        try:
            #Point to XYZ
            point = XYZ(p.X, p.Y, p.Z)
            newPipeId = BreakCurve(doc, pipe.Id, point)
            #Get new pipe
            newPipe = doc.GetElement(newPipeId)
            #Get new pipe connectors
            newPipeConnectors = newPipe.ConnectorManager.Connectors
            #Check
            connA = None
            connB = None
            for c in pipe.ConnectorManager.Connectors:
                pc = c.Origin
                #get connectorB near to connectorA
                    nearest = [x for x in newPipeConnectors if pc.DistanceTo(x.Origin) < 0.01]
                #If exists asign
                if nearest:
                    connA = c
                    connB = nearest[0]
            #doc Create fitting
            takeoff = doc.Create.NewUnionFitting(connA, connB)
        except:
            pass

# transaction done
TransactionManager.Instance.TransactionTaskDone()
# Assign your output to the OUT variable.
OUT = 0